Testing React Native Apps with Maestro
2023-10-23
Introduction
Welcome to this two-part series on setting up end-to-end (E2E) tests for our Expo project using Maestro. E2E tests ensure our entire application functions smoothly, from user interactions on the front end to data handling on the back end. In this first part, we will focus on the basic setup, and in the subsequent parts, we will delve deeper into more intricate examples.
TLDR; All the code in this guide can be found here
Versions used:
- Expo: ~49.0.15
- EAS-cli: 5.4.0
Getting Started
To kick things off, set up your Expo project:
# initialize a new project
npx create-expo-app -t expo-template-blank-typescript

# choose a name
expo-maestro-example

# cd into project directory
cd expo-maestro-example
For this example I added the -t flag to set it up with typescript and chose the navigation template.
Next we are going to add EAS (Expo Application Services) to our project so we can build our app.
# install the latest version of the cli
npm install -g eas-cli
# log in to your expo account
eas login
# configure project for EAS build
eas build:configure
Lastly, we are going to add the development client to our project. This allows us to develop against a debug build of our application, which gives us a lot of advantages when it comes to testing!
# install the dev client package
npx expo install expo-dev-client
Update the development build profile to include the dev client option:
{
    "build": {
        "development": {
            "ios": {
                "simulator": true
            },
            "developmentClient": true
        },
        "preview": {
            "ios": {
                "simulator": true
            }
        },
        "test": {
            "ios": {
                "simulator": true
            },
            "android": {
                "buildType": "apk"
            }
        },
        "production": {}
    }
}
Run the build with the command:
eas build -p ios --profile developmentIntegrating Maestro
Maestro is pretty straight forward to setup. There’s nothing we have to add explicitly to our app to get started. You can view the steps here. Once that’s done all you have to do is create an account and login!
Side Note:
You may not have Java runtime installed so in that case the login command will fail, if that happens you can follow the steps in this issue to resolve itWriting and Running Tests
With Maestro ready, it’s time to create tests! In this example, we’ve made modifications to the App function to test user interactions. Maestro lets us target items via text, but it’s better to be explicit and use testID.
import React, { useState } from "react";
import { StatusBar } from "expo-status-bar";
import { StyleSheet, Text, View, Button } from "react-native";

export default function App() {
    const [counter, setCounter] = useState(0);
    const shouldShowTitle = counter > 10;

    return (
        <View style={styles.container}>
            <Text>Open up App.tsx to start working on your app!</Text>
            {shouldShowTitle ? (
                <Text testID="special-title">You made it to 10!</Text>
            ) : null}
            <Text style={styles.counterText}>{counter}</Text>
            <View style={styles.buttonContainer}>
                <Button
                    testID="increment-button"
                    title="Increment"
                    onPress={() => setCounter(counter + 1)}
                />
                <Button
                    testID="decrement-button"
                    title="Decrement"
                    onPress={() => setCounter(counter - 1)}
                />
            </View>
            <StatusBar style="auto" />
        </View>
    );
}
With our app running we’ll want to run maestro studio, this will give us a nice UI to begin composing tests for our features.
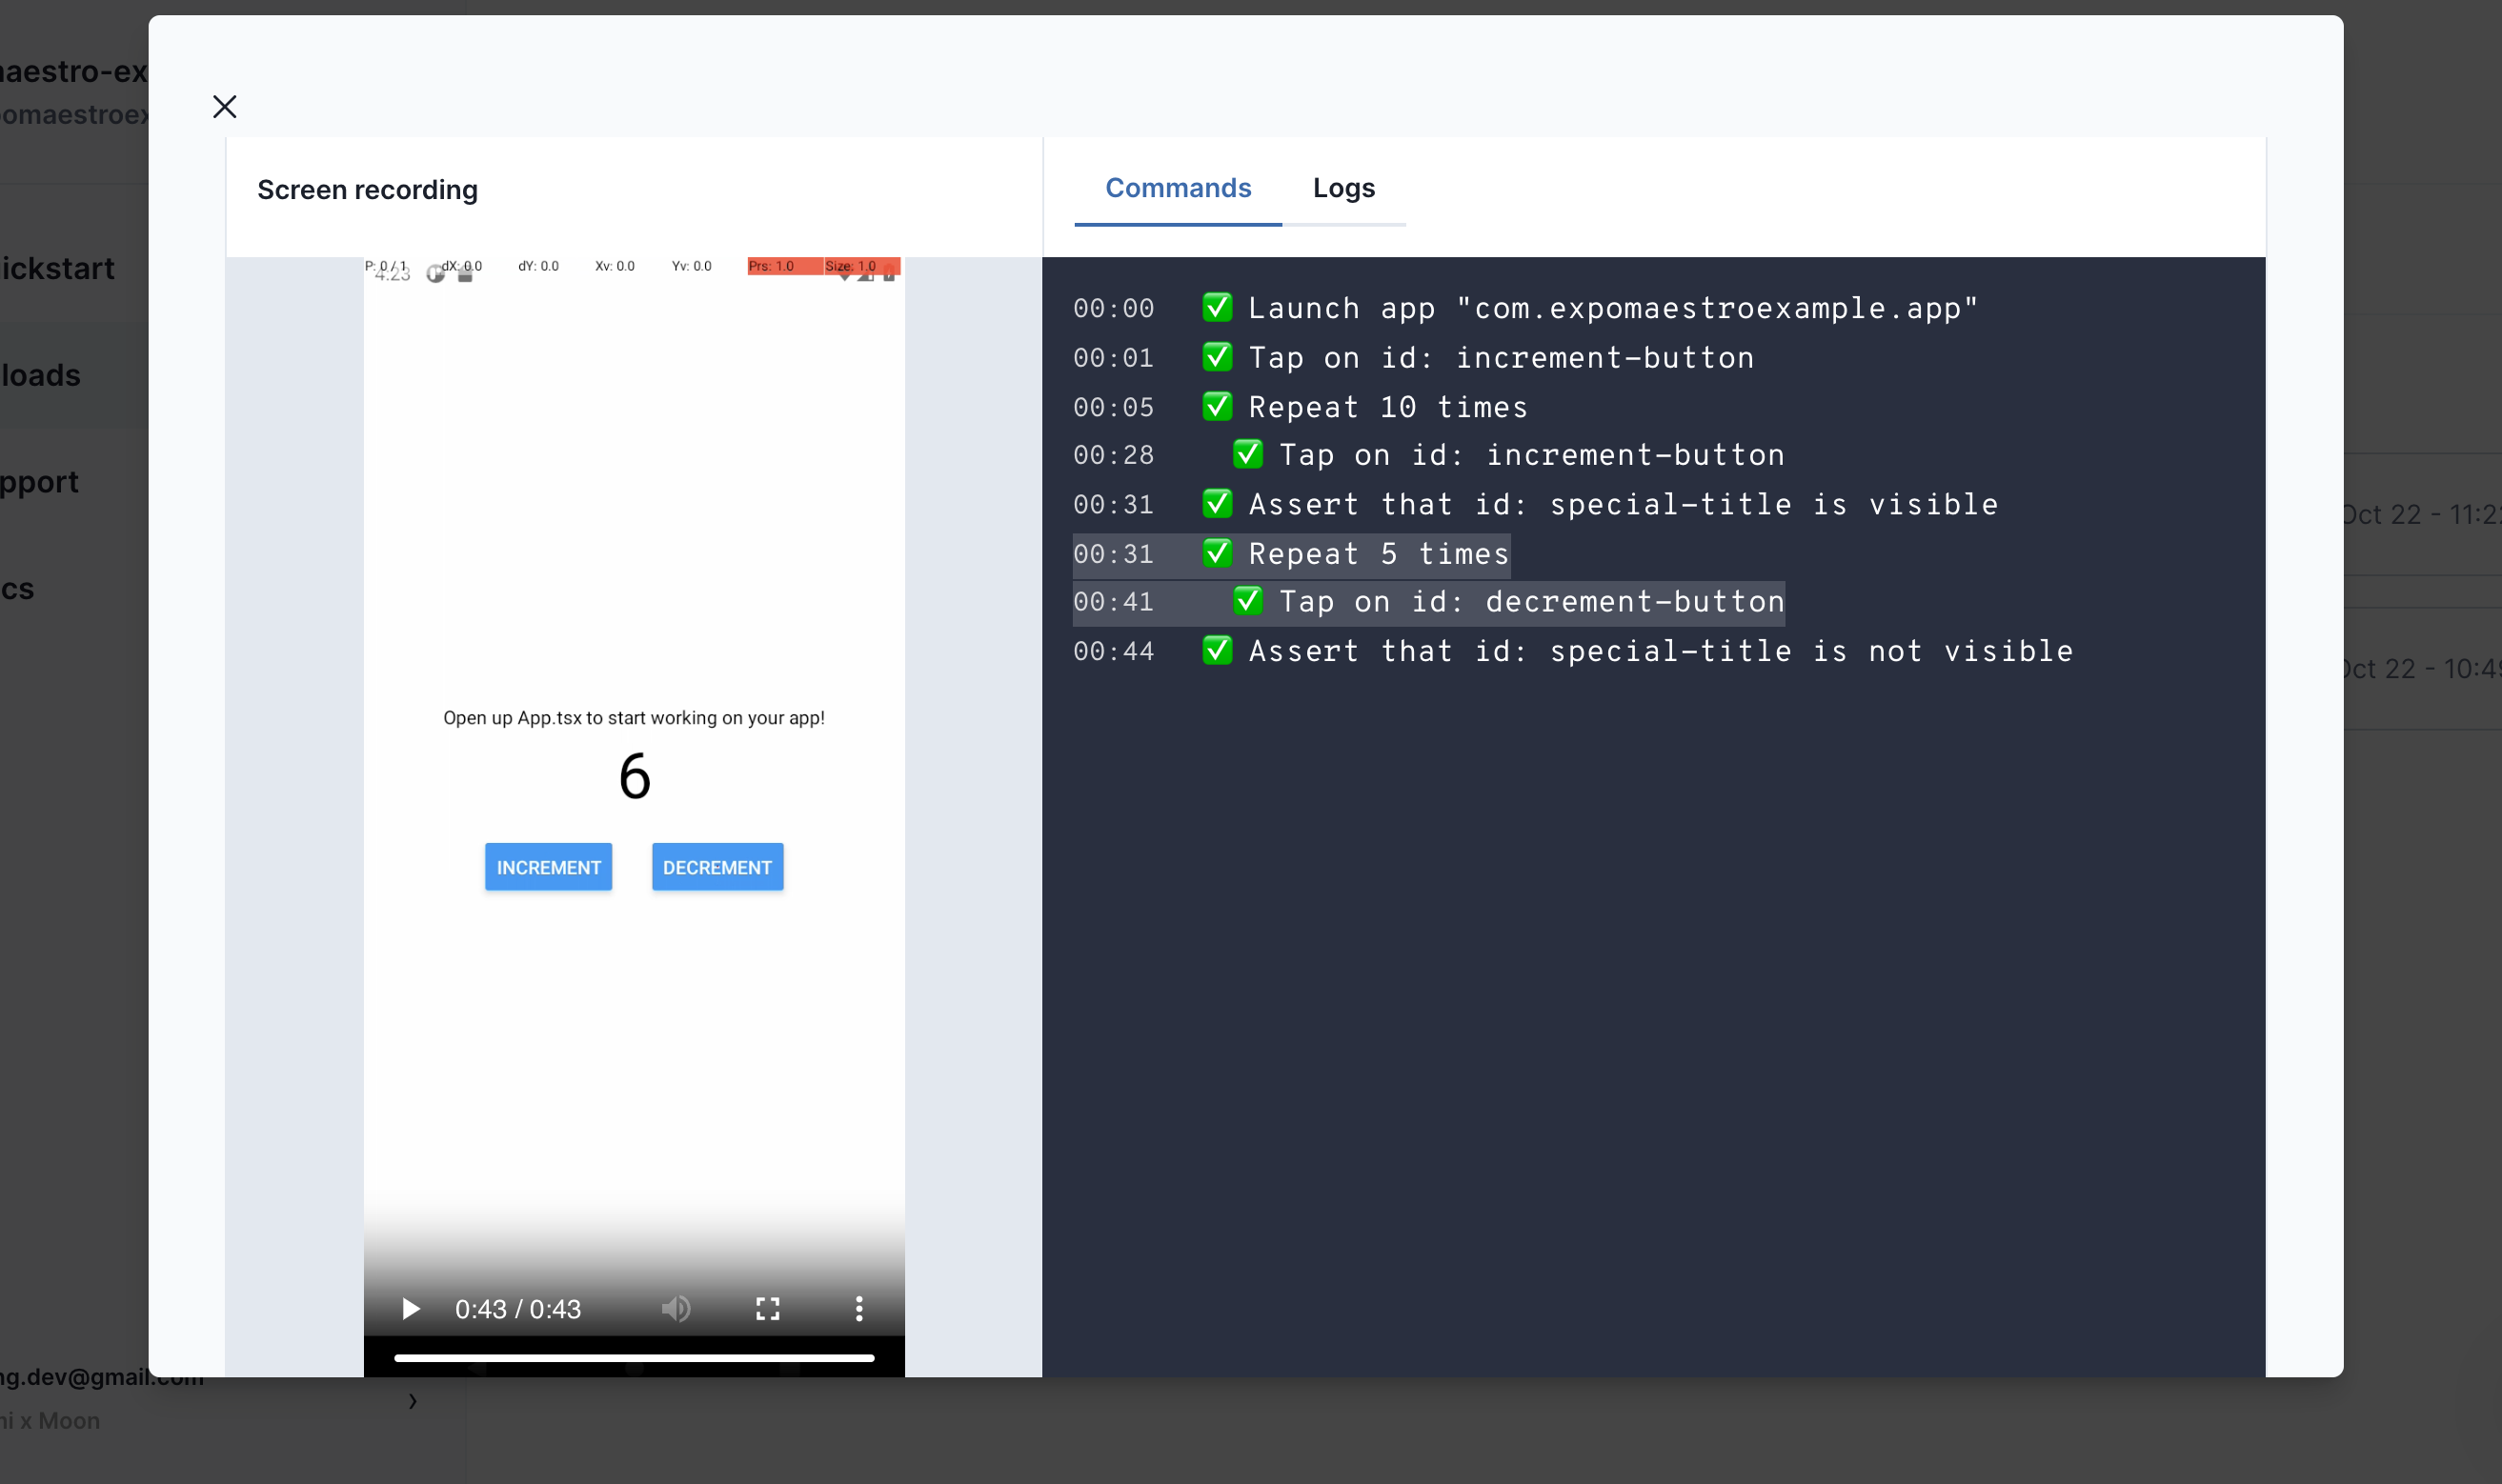
maestro studioAs you can see here, we wrote some simple instructions to test that when the user clicks the increment button enough times the title will show, and that it disappears when they click decrement. We can export these instructions and it generates a yaml file for use that looks like this.
appId: com.expomaestroexample.app
---
- launchApp
- tapOn:
      id: "increment-button"
- repeat:
      times: 10
      commands:
          - tapOn:
                id: "increment-button"
- assertVisible:
      id: "special-title"
- repeat:
      times: 5
      commands:
          - tapOn:
                id: "decrement-button"
- assertNotVisible:
      id: "special-title"
We can save this to our .maestro folder, I called mine .maestro/app.yml, and run it with the command maestro test .maestro/
CI/CD Integration
Now that we are able to write tests and run those tests locally, we want to be able to run them in our CI/CD pipelines. We can do this leveraging EAS and Maestro Cloud.
This is our yaml configuration in total, but ill explain some of the sections in more detail below:
name: Maestro Tests
on:
workflow_dispatch:
env:
MAESTRO_ANDROID_APP_FILE: "TEST_BUILD_ANDROID.apk"
MAESTRO_IOS_APP_FILE: "TEST_BUILD_IOS.app"
ANDROID_DOWNLOAD_FILE: "TEST_BUILD_ANDROID.apk"
IOS_DOWNLOAD_FILE: "TEST_BUILD_IOS.tar.gz"
jobs:
run-tests:
name: E2E Tests
timeout-minutes: 15
runs-on: ubuntu-latest
steps:
- name: 🏗 Setup repo
uses: actions/checkout@v3
- name: 🚚 Setup Node
uses: actions/setup-node@v3
with:
node-version: 18.x
cache: npm
- name: 🛠️ Setup EAS
uses: expo/expo-github-action@v8
with:
eas-version: latest
token: ${{ secrets.EXPO_TOKEN }}
packager: npm
- name: 📦 Install Dependencies
run: npm install
- name: 🤖 Download Android App File
run: eas build:list --json --limit=1 --platform=android --buildProfile=test --non-interactive | jq '.[0].artifacts.buildUrl' | xargs -I {} wget -O ${{ env.ANDROID_DOWNLOAD_FILE }} {}
shell: bash
- name: Download iOS App File
run: eas build:list --json --limit=1 --platform=ios --buildProfile=test --non-interactive | jq '.[0].artifacts.buildUrl' | xargs -I {} wget -O ${{ env.IOS_DOWNLOAD_FILE }} {}
- name: 📦 Extract iOS App File
run: mkdir -p ./${{ env.MAESTRO_IOS_APP_FILE }} && tar -xzf ${{ env.IOS_DOWNLOAD_FILE }} -C ./${{ env.MAESTRO_IOS_APP_FILE }} --strip-component=1
shell: bash
- id: android-upload
name: 📝 Run Maestro Android Tests
uses: mobile-dev-inc/action-maestro-cloud@v1.6.0
with:
api-key: ${{ secrets.MAESTRO_CLOUD_API_KEY }}
app-file: ${{ env.MAESTRO_ANDROID_APP_FILE }}
- id: ios-upload
name: 📝 Run Maestro iOS Tests
uses: mobile-dev-inc/action-maestro-cloud@v1.6.0
with:
api-key: ${{ secrets.MAESTRO_CLOUD_API_KEY }}
app-file: ${{ env.MAESTRO_IOS_APP_FILE }}
- name: Access Outputs
if: success()
run: |
echo "Android Result"
echo "Console URL: ${{ steps.android-upload.outputs.MAESTRO_CLOUD_CONSOLE_URL }}"
echo "Flow Results: ${{ steps.android-upload.outputs.MAESTRO_CLOUD_FLOW_RESULTS }}"
echo "Upload Status: ${{ steps.android-upload.outputs.MAESTRO_CLOUD_UPLOAD_STATUS }}"
echo "App Binary ID:: ${{ steps.android-upload.outputs.MAESTRO_CLOUD_APP_BINARY_ID }}"
echo "iOS Result"
echo "Console URL: ${{ steps.ios-upload.outputs.MAESTRO_CLOUD_CONSOLE_URL }}"
echo "Flow Results: ${{ steps.ios-upload.outputs.MAESTRO_CLOUD_FLOW_RESULTS }}"
echo "Upload Status: ${{ steps.ios-upload.outputs.MAESTRO_CLOUD_UPLOAD_STATUS }}"
echo "App Binary ID:: ${{ steps.ios-upload.outputs.MAESTRO_CLOUD_APP_BINARY_ID }}"In some other implementations online, people have opted for EAS build hooks and uploading the app to maestro once the build finishes. This means that you have to do a build on each run of your E2E tests, which is generally okay but it means that we run the hook even if there aren’t code changes. The EAS hook approach is also a little more black box since we don’t actually see our test results within the github hook and we can’t leverage maestro’s github action. We’ve opted for downloading the binary from a specified build channel and you only have to update that channel when you have new changes that you want to test and capture. For example if you wanted to run a regression test when implementing a large change.
In order to go this route we need to adjust to some constraints, the first being how expo gives us the app bundles and then how maestro is expecting to receive them. For android this is pretty straight forward since expo gives us a .apk file and that’s what maestro expects. For iOS expo gives us a .tar.gz file and maestro is expecting either a .app folder or a .zip so we have to prepare to convert.
Here we download the files for iOS and Android, and then in the case of iOS we extract the tar.gz to get the app folder.
- name: 🤖 Download Android App File
run: eas build:list --json --limit=1 --platform=android --buildProfile=test --non-interactive | jq '.[0].artifacts.buildUrl' | xargs -I {} wget -O ${{ env.ANDROID_DOWNLOAD_FILE }} {}
shell: bash
- name: Download iOS App File
run: eas build:list --json --limit=1 --platform=ios --buildProfile=test --non-interactive | jq '.[0].artifacts.buildUrl' | xargs -I {} wget -O ${{ env.IOS_DOWNLOAD_FILE }} {}
- name: 📦 Extract iOS App File
run: mkdir -p ./${{ env.MAESTRO_IOS_APP_FILE }} && tar -xzf ${{ env.IOS_DOWNLOAD_FILE }} -C ./${{ env.MAESTRO_IOS_APP_FILE }} --strip-component=1
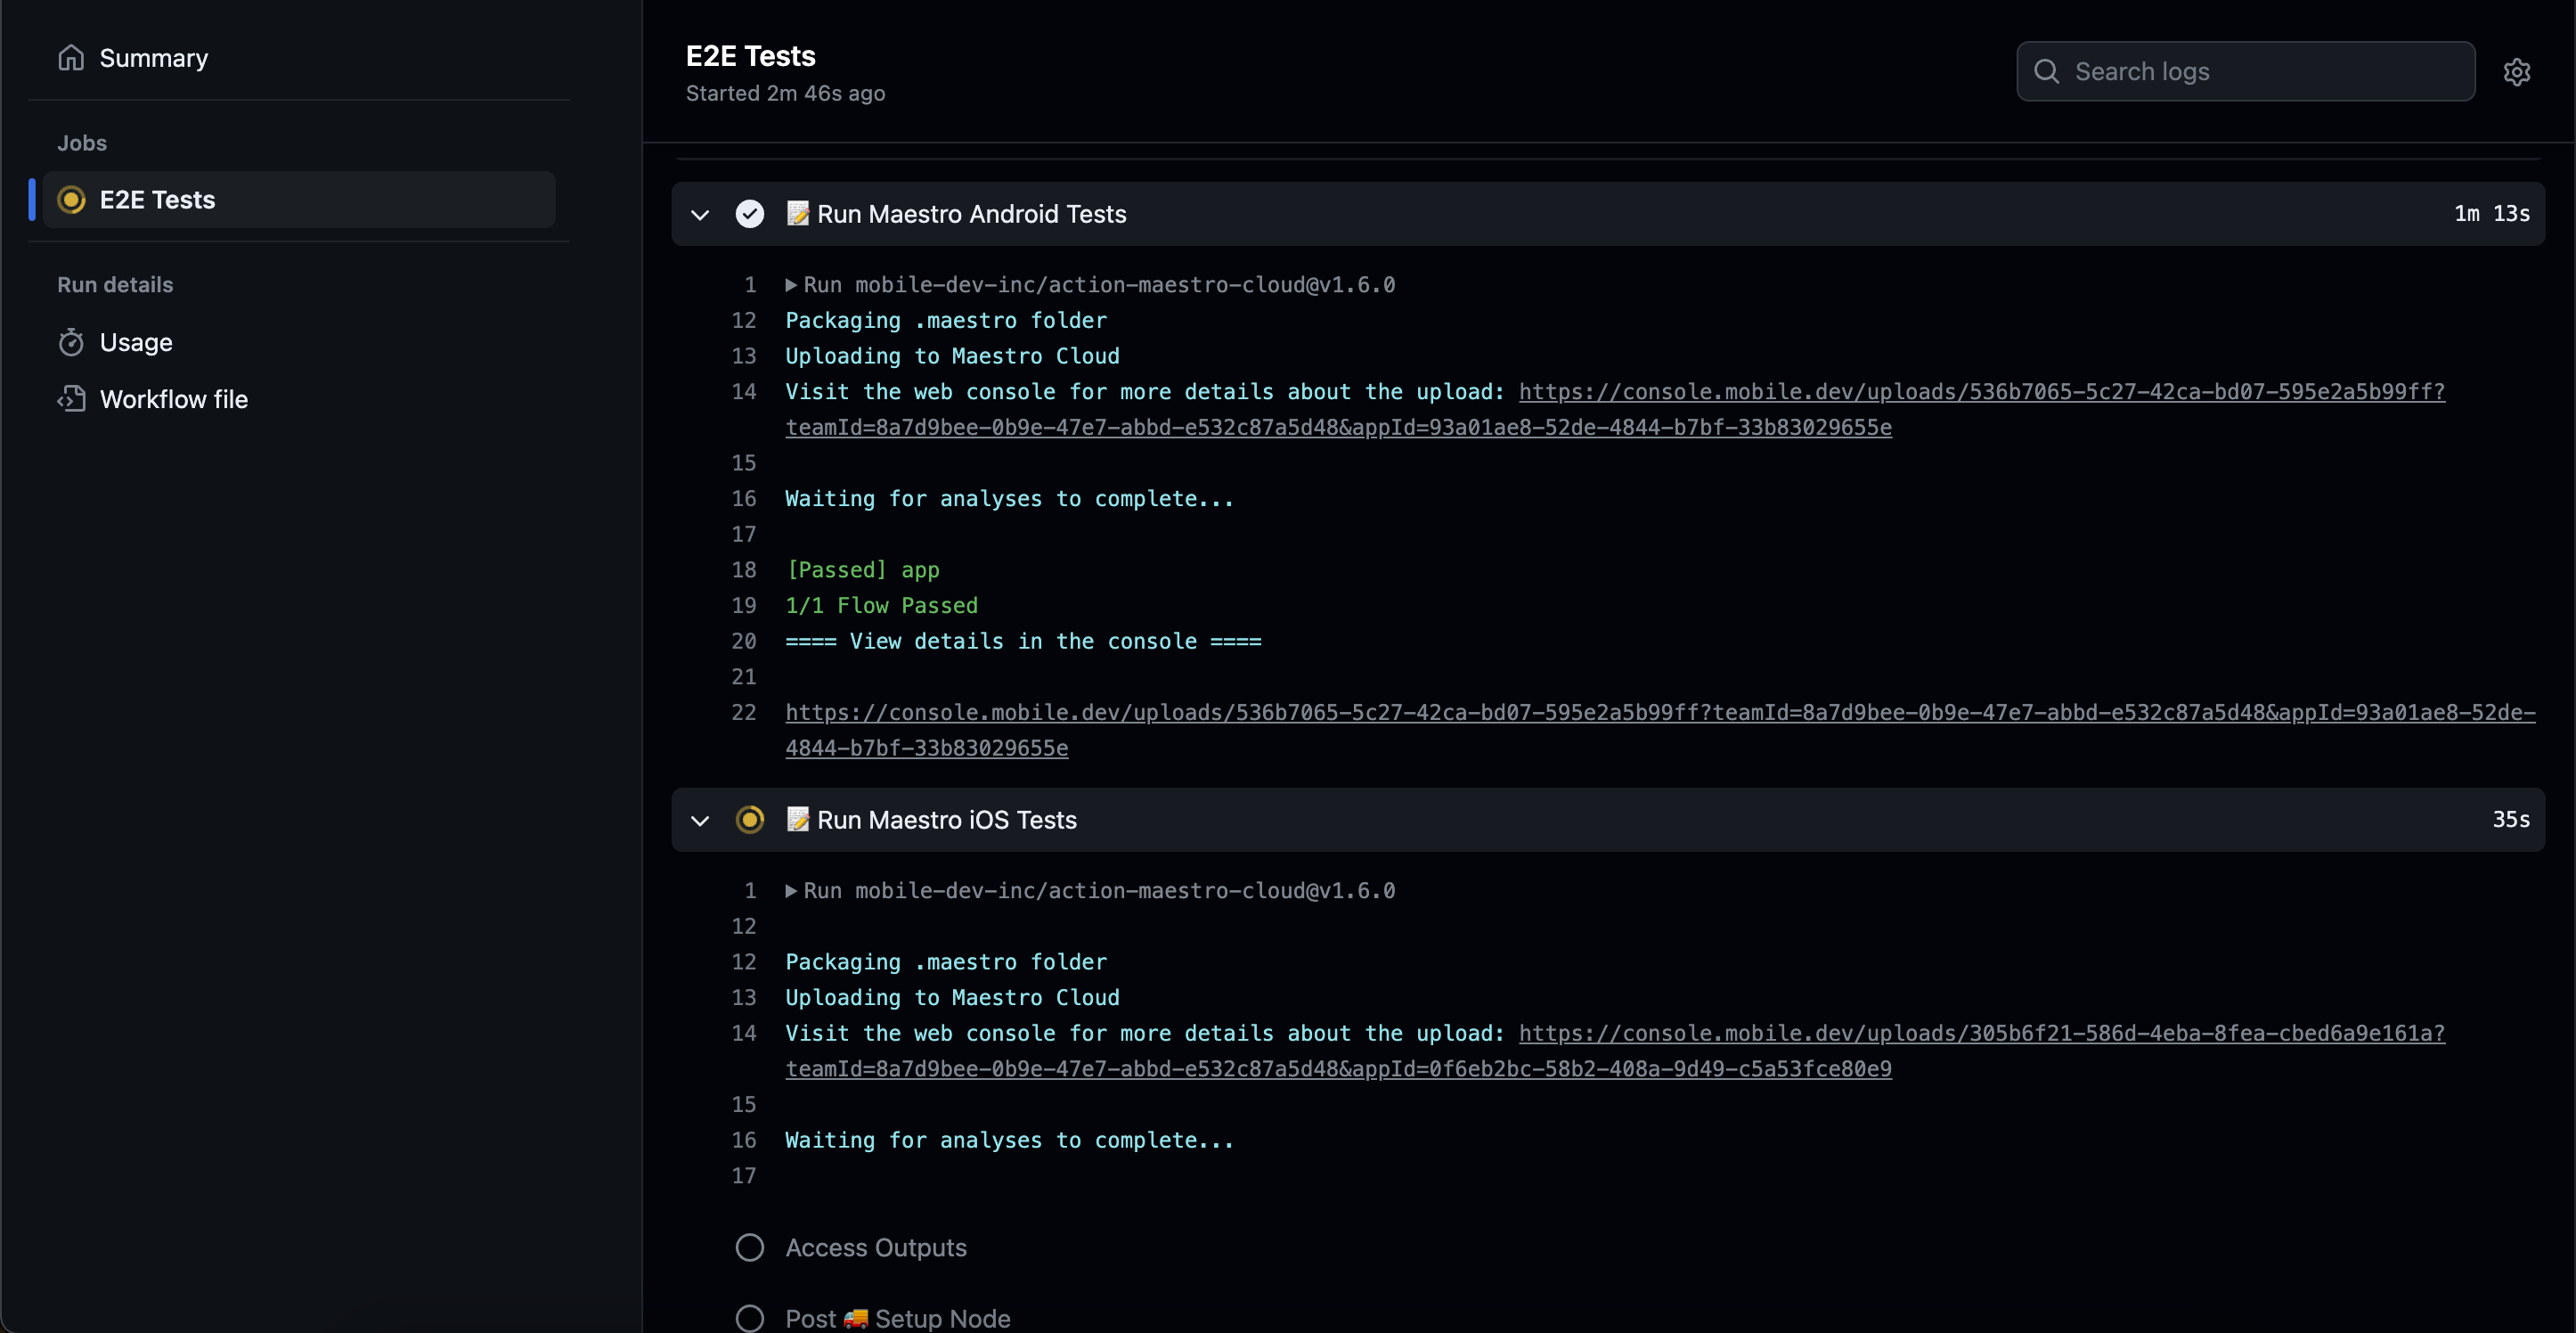
shell: bashAfter we run our action we can see the test results in the maestro cloud dashboard!
Thanks for reading!